Star Wars Jedi: Survivor is a popular video game that lets players explore different planets, collect items and defeat enemies. One of the main challenges players face is finding all the collectibles scattered across each planet, including chests, essences, seed pods, and databanks.
Fortunately, there are five map upgrades available that can help locate each collectible type. This guide will provide a step-by-step process for obtaining all map upgrades in Star Wars Jedi: Survivor.
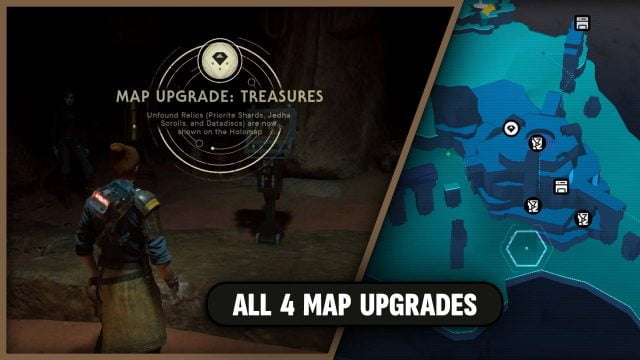
All 4 Map Upgrades in jedi Survivor

By following this guide, players can enhance their in-game map and make their treasure hunting experience easier.
Chest Map Upgrade Location in Koboh
The Jedi Survivor Chest Map Upgrade is a handy tool that reveals the locations of all chests in the game. In this step-by-step guide, we’ll walk you through the process of obtaining the Chest Map Upgrade in Koboh, ensuring that you never miss out on any valuable loot again.

Step 1: Obtain the Green Barrier Ability
Before embarking on your quest to access the Phon’Qi Caverns, you must first acquire the ability to pass through green barriers. Don’t worry; you can obtain this useful ability during your mission on Koboh.
Step 2: Journey to the Phon’Qi Caverns
To reach the Phon’Qi Caverns, follow the path near the Pyloon Saloon that leads upwards to the Foothill Falls. Choose the correct road branch and climb up the zipline.
Glide down to the shack located on the other side of the Relter, slightly to your left. Prepare for a brief encounter with three raider grunts on the left side of the shack. After dealing with them, search for the basement access. Employ your Force Pull ability to remove the cover and jump inside.
Step 3: Recruit the Droid T-1N8
Once you’re inside the basement, you’ll stumble upon the T-1N8 droid, who can be a valuable ally. Engage in conversation with her and direct your attention to the panel on the left wall. Use your Force Pull ability to remove it, granting you access to the Phon’Qi Caverns.
Step 4: Activate the Caverns Meditation Point
As you step into the caves, go to the first path on the right and trigger the Meditation Point. This will be a valuable checkpoint throughout your journey.
Step 5: Locate the Jedi Survivor Chest Map Upgrade
To find the coveted Jedi Survivor Chest Map Upgrade, navigate through the cavern, proceeding forward until you encounter an objective. Activate the objective, and it will open a passageway leading to the next phase of the caverns.
Be prepared to face suicide droids rushing at you with thermal detonators. Additionally, beware of a collapsing bridge along the way. To reach the yellow light on the right side of the room, you must employ your acrobatic skills by double jumping and dashing or utilizing the grapple point directly above it.
Step 6: Overcome the Melee Droid Guards
Enter a chamber guarded by two melee droid guards and engage in battle to defeat them. Continue through the cave tunnel illuminated by plants.
Later, you will activate some turrets, they can be easily eliminated using your force slam ability. Afterward, use your grappling hook to ascend and explore a new cave layer.
Within this layer, you will find a scalable flat wall. Traverse it until you reach its end, where you will be able to bring down a portion of the cave’s ceiling, forming an opening that leads to the subsequent phase of the cavern.
Step 7: Confront and Overcome the Rancor
One of the initial challenges you’ll encounter is the formidable Rancor. Once you have unlocked the floor, you’ll come face-to-face with this legendary creature.
Utilize your combat prowess to defeat the Rancor, allowing you to venture even deeper into the cave system.
Step 8: Traverse the Exploding Ball-Filled Room
Prepare yourself for a room filled with exploding balls that you must navigate to progress to the next stage of the caverns. Carefully descend each ledge, avoiding areas occupied by explosive plant balls. Be mindful of the awakening suicide droids as you proceed.
Step 9: Activate the Shortcut
Having successfully crossed the treacherous gap, take a moment to activate the shortcut. This will prove invaluable in the future, making it easier for you to navigate your way back through the caverns.
Congratulations! By following this comprehensive guide, you’ve successfully obtained the Jedi Survivor Chest Map Upgrade in Koboh. Armed with this invaluable tool, you’ll now be able to uncover hidden chests and collectibles with ease.
Essence Map Upgrade Location on Koboh
Star Wars Jedi Survivor features an essential upgrade called the essence map. This upgrade unveils the locations of vital items like health force, skill points, and more within the game.
However, obtaining the essence map upgrade is not a walk in the park.

This guide will show you how to unlock your full potential by upgrading your gameplay with the Essence Map.
What is the Essence Map Upgrade?
The Jedi Survivor Essence Map Upgrade is an essential addition to your Holomap that shows all uncollected Essence orbs. It makes finding missing items easier for players and rewards diligent explorers, ensuring no treasure remains untouched.
How to Unlock the Essence Map Upgrade
Unlocking the Essence Upgrade can be a challenging yet rewarding task. Here are some simple steps to follow:
- Complete all seven Jedi Meditation Chambers.
- Go back to the Alignment Control Center located in the Untamed Downs on Koboh.
- Interact with the terminal and receive your reward.
- The map upgrade will now allow you to see all available Essences on your map.
Where are The Locations of Essential Collectibles?
To gain access to this map upgrade, head to the Alignment Control Center situated in the Untamed Downs on planet Koboh and find a door that leads to an elevator which takes you down to it. You will find several terminals corresponding to each collectible found on the planet here.
Complete each terminal’s assigned task and obtain different perks offered at each one. Upon successfully finishing all tasks, terminals will turn green, and across from BD-1’s activated terminal, users will find their map upgrade terminal.
Let BD-1 slice into that terminal to activate it, and start exploring new dimensions of gaming experience.
Why Should You Collect Essences?
In Star Wars Jedi: Survivor game players need essences as they play Cal Kestis character who embarks on an adventure filled with missions and numerous secret collectibles. These powerful blue orbs boost skill points, maximize health, and grant special abilities that significantly impact gameplay.
Collecting these powerful orbs further enhances skills and abilities, which players fully appreciate in their quest to become the ultimate Jedi Survivor. So exploring all of the planets in great detail and collecting all essences contributes to a more comprehensive and enjoyable gameplay experience.
How Does the Map Upgrade Help?
The map covers multiple planets, making it easy for players to explore and track down the Essences. However, identifying the type of reward contained within each essence from a distance is not possible, encouraging players to seek them all out.
With this upgrade, players can easily track their progress and access vital collectibles that they may have missed along their journey. The Essence Map Upgrade undoubtedly contributes to a more satisfying gaming experience by helping you identify locations of essential collectibles.
Treasures Map Upgrade Location on Jedha

To aid in the collection of items, players can unlock map upgrades that show the location of hidden treasures and other collectibles. One such upgrade is the Treasures Map Upgrade, which is particularly useful for finding missing Priorite Shards and Jedha Scrolls. Here are steps on how to get this upgrade:
Step 1: Activate all Three Desert Ruins on Jedha
To access the Wayfinder’s Tomb, you will need to activate all three Desert Ruins on Jedha. These ruins can be found by exploring the planet and solving various puzzles. Activate each ruin by solving its respective puzzle and gathering the necessary components.
Step 2: Enter the Wayfinder’s Tomb
Once all three ruins are activated, head to the Wayfinder’s Tomb. This tomb is located on Jedha and can be accessed by solving the puzzle that unlocks its entrance.
Step 3: Unlock the Map Upgrade Terminal
Inside the Wayfinder’s Tomb, you will find a terminal that you can interact with to unlock the Treasures Map Upgrade. To unlock the terminal, players need to follow a specific set of actions that involve moving a metal ball to the top of a structure.
Step 4: Solve the Puzzle
The puzzle involves moving the metal ball to the top of the structure by using timed and movement elements. Players must use the force to move the ball around and avoid any obstacles that come in the way.
Once the ball reaches its final resting place at the top, there will be noticeable changes in the tomb, and the terminal to unlock the Treasures Map Upgrade will become active.
Step 5: Interact with the Terminal
Once the terminal is active, you can interact with it to unlock the Treasures Map Upgrade. This upgrade will show the location of any missing Priorite Shards and Jedha Scrolls on your map, making it easier to complete your collection of items.
To summerize, the Treasures Map Upgrade is a valuable addition to any player’s map in Star Wars Jedi Survivor. It makes locating missing items such as Priorite Shards and Jedha Scrolls much easier and can help players complete their collection faster.
Databanks Map Upgrade Location on Zeffo

Star Wars Jedi: Survivor has a lot of collectibles that can be challenging to keep track of. However, Cal Kestis can unlock new abilities and upgrades that make treasure hunting much easier.
One of the essential upgrades is the Databanks Map Upgrade, which allows players to locate all the objects available for scanning or sensing. Follow these steps to unlock the Databanks Map Upgrade:
Step 1: Reach the Base Commander’s Office on Zeffo
The first step to acquiring the Databanks Map Upgrade is to get to the base commander’s office on Zeffo. This location can be quite tricky to reach, but players must navigate through several challenges to get there.
Once players arrive at the base commander’s office, they should proceed towards the front of the office, where the windows are located. Then, make a left turn and keep moving until a terminal appears.
Step 2: Use the Terminal
Interact with the terminal by pressing the required button to activate it. Once the terminal is activated, players will be able to select the Databanks Map Upgrade. Select it by clicking on it, and BD-1 will undergo an upgrade that will allow players to find all objects available for scanning or sensing.
Step 3: Start Scanning and Sensing
After acquiring the Databanks Map Upgrade, players can start scanning and sensing for things of interest. It is an excellent tool to help players keep track of collectibles that are missing or items that require further exploration.
In summary, acquiring the Databanks Map Upgrade in Star Wars Jedi: Survivor is no easy task, but it is certainly worth it. Players must reach the base commander’s office on Zeffo and use the terminal located there to acquire the upgrade. Once the upgrade is obtained, players can start scanning and sensing objects of interest easily.