Welcome to a galaxy far, far away! In the Star Wars universe, there are few things as iconic as the Jedi Order and their incredible combat skills. We all know the Jedi are formidable warriors, but what about Jedi survivors?
These are individuals who have lived through some of the most tumultuous times in the galaxy, often having to fight for not only their own survival but for the survival of the Order. One of the most interesting aspects of these survivors is their stance: the way they hold their lightsabers in battle.
In this blog post, we’re going to take a deep dive into the best Jedi survivor stance and what makes it so effective. Whether you’re a Star Wars fan or a martial artist yourself, you won’t want to miss this!
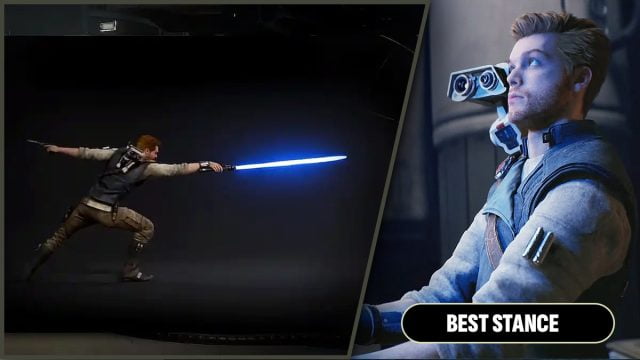
What is the Best Stance in Star Wars Jedi: Survivor?

Star Wars Jedi: Survivor offers a variety of different lightsaber stances that players can use throughout their galactic adventures. Each stance has its own perks and drawbacks, making it important to choose the right stance for each encounter.
While there is no set best stance in Jedi Survivor, there are certain situations where certain stances shine above others. Whether it’s the balanced Single Blade Stance, the group-focused Double-Bladed Stance, the quick and fun Dual Wielding Stance, the distant Blaster Stance, or the powerful but precise Crossguard Stance, players have plenty of options to diversify their gameplay and become a true Jedi.
Overview of New Lightsaber Stances in Jedi: Survivor
Star Wars Jedi: Survivor introduces five new lightsaber stances for players to master. The Single-Bladed stance is a balanced option that relies on quick precision strikes. The Double-Bladed stance is perfect for large group encounters, as it can hit nearby enemies.
The Dual-Wielding stance is fast-paced, but requires time and dedication to master. The Blaster stance is ideal for enemies at a distance but struggles up close.
Finally, the Crossguard stance offers powerful swings with strong defense, but requires timing and precision. Remember, players can only equip two stances at a time and should choose their stances strategically based on the encounter or enemy they will face.
How to Change and Unlock Lightsaber Stances
To change and unlock lightsaber stances in Jedi: Survivor, players need to progress through the game and defeat certain enemies. The single-bladed stance is already available from the start, but other stances such as the double-bladed, dual wielding, blaster, and crossguard stances require specific unlocks.
For example, the double-bladed stance is unlocked shortly after starting Coruscant, while the crossguard stance is only available after defeating Drya Thornne in the Shattered Moon. To switch stances mid-combat, players need to hold down the stance button and select their preferred stance from the options available.
Single-Bladed Stance: A Solid Fencing Stance with Great Quick Strike Perks

The Single-Bladed Stance is a popular choice among Jedi survivors due to its focus on fencing techniques. This stance emphasizes speed and agility, making it a strong option for quick strikes and evasive maneuvers.
- Power: 5
- Speed: 5
- Range: 5
- Defense: 5
Additionally, this stance allows for precision attacks to dismember limbs, which can incapacitate enemies without killing them. However, it may not be the best option for large group encounters, as the focus on one-on-one combat can leave Jedi survivors vulnerable to attack from multiple opponents.
Overall, the Single-Bladed Stance is a solid choice for Jedi survivors looking to hone their fencing skills and rely on quick strikes.
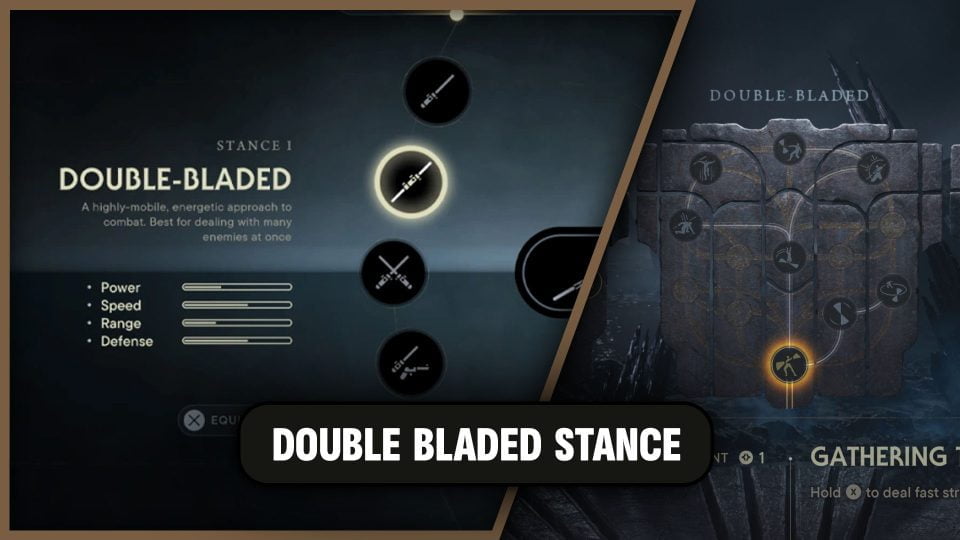
Double-Bladed Stance: Great for Large Enemy Encounters in Groups Around You

The double-bladed stance in Star Wars Jedi: Survivor is an excellent choice when facing large groups of enemies. With its increased reach, it can hit multiple enemies at once and defend against multiple attackers.
- Power: 4
- Speed: 6
- Range: 4
- Defense: 6
While it may not be as powerful as some of the other stances, it offers a good balance of offense and defense. This stance is perfect for those who prefer to take on enemies head-on and don’t mind getting up close and personal.
Just remember to switch to different stances when facing single enemies or specific encounters where the double-bladed stance might not be as effective.
Dual Wielding Stance: Fun and Quick, But Requires Time and Dedication to Master

The Dual Wielding Stance in Star Wars Jedi: Survivor is a fun and quick stance, but requires time and dedication to master. With the ability to use two lightsabers at the same time, the player can easily overwhelm their opponent and drain their stamina.
- Power: 6
- Speed: 10
- Range: 2
- Defense: 3
However, using two sabers can be quite taxing if the player gets put on the defensive. Additionally, the Dual Wielding Stance offers only three bars of block stamina, making it more challenging to block attacks compared to other stances. With the right upgrades and skills, Dual Wielding can be a powerful stance for dueling, but it may be more beneficial to use another stance for larger groups.
Blaster Stance: Perfect for Enemies at a Distance, Struggles Up Close

The Blaster Stance in Star Wars Jedi: Survivor is perfect for enemies at a distance. This stance allows players to charge up their blaster and deal a charged attack, which can deal massive amounts of damage to enemies without wasting force meter or requiring players to parry blaster shots.
- Power: 3
- Speed: 7
- Range: 10
- Defense: 5
It’s a great way to take out ranged enemies without wasting resources. However, the Blaster Stance struggles up close, so it’s best to switch to a different stance when facing enemies in melee combat. Overall, the Blaster Stance adds a lot of versatility to gameplay and is a favorite among many players.
Crossguard Stance: Powerful Swings, but Requires Timing and Precision

The Crossguard Stance in Star Wars Jedi: Survivor may be slow and requires precise timing, but its powerful swings can devastate enemies.
- Power: 10
- Speed: 1
- Range: 6
- Defense: 7
It sacrifices speed for high damage output, making it ideal for one-on-one fights. However, because the wind-ups for swings are long, the player must be strategic and precise with their attacks to avoid leaving themselves open to enemy attacks.
Overall, the Crossguard Stance is a viable option for players who prioritize high damage output and have a steady hand.
Which Stance to Use for Different Encounters or Enemies
When playing Star Wars Jedi: Survivor, it’s important to use the right stance for different encounters or enemies. The Blaster Stance is great for enemies with ranged attacks, allowing you to take them out without wasting force meter or requiring parrying. The Dual-Wield Stance is best used for offensive maneuvers if you’re confident in your dodging ability.
The Double-Bladed Stance is perfect for crowd control, but may not be suitable for single-target encounters. The Single Stance is reliable and average in every respect. The Crossguard Stance is tailored for heavy weapons, but its slow wind-up animations can leave the player vulnerable to swifter enemies. Ultimately, there is no set best stance as each has its own perks and drawbacks.
Conclusion: No Set Best Stance, Each has Its Perks and Drawbacks
In conclusion, there is no set best lightsaber stance in Star Wars Jedi: Survivor. Each stance has its perks and drawbacks, making it important to choose the right one for each encounter or enemy. Single Blade Stance is the most balanced option for single enemies or groups up to three. Double-Bladed Stance is great for large enemy encounters in groups around you.
Dual Wielding Stance is very quick and allows you to deal loads of damage but requires a lot of time and dedication to learn. Blaster Stance is perfect for enemies at a distance but struggles up close. Finally, Crossguard Stance deals incredibly powerful swings but comes at the cost of being slower. It’s essential to choose wisely to succeed in the game.